Canva or Google Slides for Elementary Music? What I Use in 2026
Last year, I wrote a post titled, "Elementary Music Class: Canva vs. Google Slides" and when I revisited it this week, I looked for the updates that occurred in the past year. Check out this post to see what still holds true, what no longer exists, and what has been updated to improve our workflow. Please note that I am focusing on the presentation and creative tools of each.
Tech Tip: Before you read this...I always suggest checking with your school's IT and asking them what they support. If you have a Google-driven school, then they might not be able to assist you with Canva because their expertise would be with Google Slides.
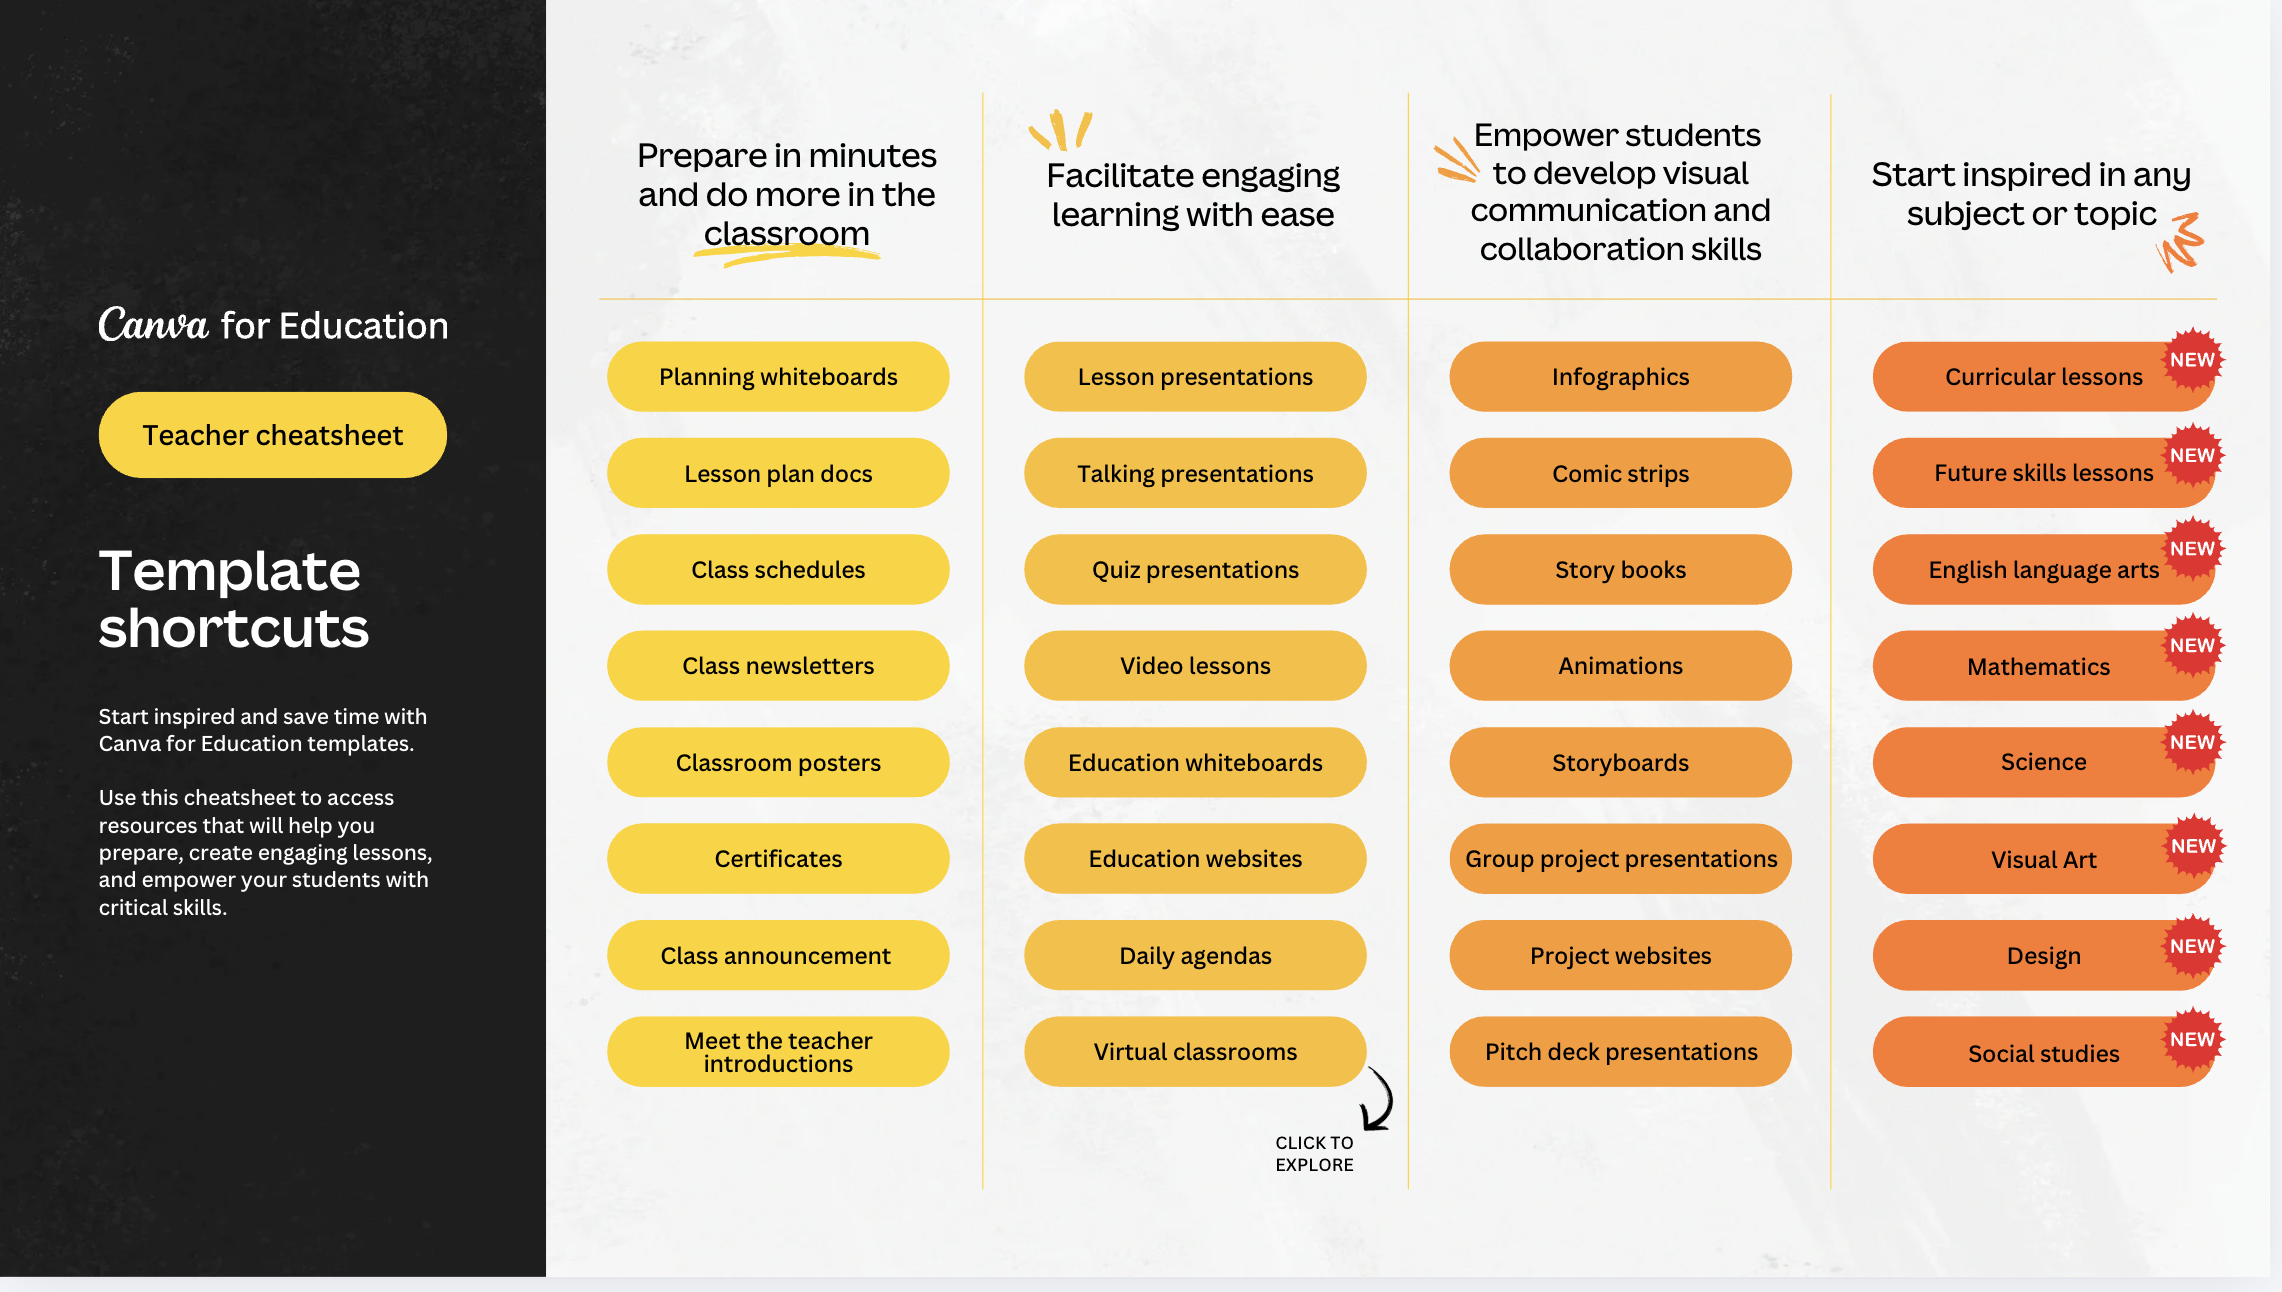
Figure 1: This is one of many other educational resources found in Canva's Design School https://www.canva.com/design/DAFAb626QKM/Cm72hgpa0PEZbUsnxRjSvw/edit
Key Advantages
Free for Eligible K-12 educators – https://www.canva.com/education/: Canva gives educators a free specialized version of Canva Pro, where most of the premium features are included. Verification can use a school email or approved documentation, so access is not necessarily tied exclusively to a school email.
Canva's Design School (https://public.canva.site/teacherresources): This site assists teachers with tutorials, designs, resources, and classroom guides.
Aesthetically rich designs – An amazing and large built-in graphics library, which allows you to upload your own materials, makes slides visually engaging for young learners.
Creative flexibility – More ways to design exactly how you want (fonts, layouts, color schemes, clip art).
Music Ed friendly – Supports Music Ed Font for notation, and you can upload any music graphics that Canva may not currently have.
Animations – Fun animations in presentation mode.
Custom templates – Can create reusable, professional-looking templates for recurring activities, units, programs, posters, certificates, manipulatives, social media posts, and so much more.
Import options – Can upload PowerPoint or PDF versions of old Google Slides and “beautify” them.
Export versatility – Save as PNG, JPG, PPTX for use in Google Slides, PowerPoint, or offline.
Sharing capabilities – Can share your presentation in numerous ways with colleagues and students.
Learning resources – There are many tutorials via YouTube channels or courses run by communities or universities to help you learn how to use Canva.
Remote – Can use your own phone as a remote in Canva by activating the "Share remote control" feature within Canva's Presenter View.
Offline Mode - Canva now lets you prepare an existing design for offline editing and presenting on the device you will use. Do this while connected and test it before class.
Video Editing Capabilities - Though not a complete web-based video editor like Clipchamp or WeVideo, it still has video editing capabilities, and you can create and edit videos using Canva and its many versatile templates.
AI Tools #1 - Canva has a plethora of built-in AI tools, as well as apps. Some popular ones are background remover, blur tools, filters, text-to-image, Magic Layers, Magic Grab, Magic Upscale, Image to Video, Magic eraser, BG Generator, Auto Focus, Magic Write, Magic Studio, templates, image generators, music generators, and so much more.
AI Tools #2 - Besides premade templates, you can ask Canva's AI Tool (usually labeled as Magic) and give it the info you would like the slide to have and it will create a presentation for you with all of the info. From there, you can customize and adapt it to your liking and you have saved time from having to start it all from scratch.
Magic Layers - I want to highlight this tool as when you apply this to your photo, it will separate out the items that it identifies. Canva describes it as turning a flat image or design into editable layers. Results depend on what the tool identifies. From there, you can alter items, take out items, change the layout, and so much more. If you know you will be editing the photo or items more than once, where Magic Grab might work for that, then Magic Layer will do the job.
Templates - Look at these wonderful teacher templates Canva has set up (see Figure 1): https://www.canva.com/design/DAFAb626QKM/_xcjbGr8v2zIgDR86MR3TA/view?
Copying items from one project to another - You can copy slides, elements, and other items from one slideshow to another. In addition, you can access a previous project within a current project that you are working on.
Translations - It is nice that Canva can translate your slides to another language. As with any tool that translates, it is highly recommended to get a second opinion from a person who speaks the language to make sure what it translated is accurate.
You get so much to work with that if you do not have a creative bone in your body, your presentations will still look amazing.
Potential Drawbacks
Audio limitations #1 – Canva’s audio workflow centers on the presentation timeline. It lets me add and time audio within a presentation, which is useful for a planned sequence or a play-along. However, I cannot insert clickable audio buttons or sound clips per slide like in Google Slides. Workarounds exist, but they can be clunky and less intuitive.
Audio limitations #2 - To Canva's credit, when I’ve added some purchased recordings, Canva has blocked my download after detecting copyrighted audio. Canva offers a review process if you have a license that covers the intended use. A receipt for a recording alone may not include the rights needed for a video.
Canva's policy: "Canva uses audio fingerprinting to detect music that matches copyrighted content. It works like a digital tool that recognizes songs, similar to apps that identify music playing nearby. When a match is found, Canva may block the download to protect copyright holders."
When Using the Internet to Present– Presentation mode can lag or fail without strong Wi-Fi and if you present offline, see the next point.
Offline limits - You cannot start a new design, use online templates or AI tools, or export while disconnected. Embedded YouTube and other online content will not play offline as well.
Steeper learning curve – If you're used to Google Slides, navigation and organization may feel less intuitive.
Account access – If you create designs in a school-managed account, check how you can retain access to your editable work if you change schools.
Takes more time – The sheer number of design options can slow down prep for many of us who feel like the manipulatives need to be perfect (🙋♀️).
YouTube - You can embed the video, but you have to trim the video using the trim tool so it begins and ends when you would like.
Using Google Slides for Lesson Visuals
Key Advantages
Quick to edit during lessons – Can move elements around live (e.g., dragging rhythm cards, reordering images).
Built-in media and better audio capabilities – Easily embed YouTube videos, MP3s, and clickable audio buttons for backing tracks or examples.
Organization – Works well with Google Drive folders for storing lessons by grade or unit.
Offline access – Google Slides can create and edit files offline when offline access has been set up. I make the lesson file available offline ahead of time and test any audio or video I plan to play.
Works with Music Snippet (Formerly Flat for Docs) – Music notation and tablature snippets for your Google Workspace. Create your notation and quickly insert it into your Docs and Slides.
YouTube - You can embed the video and set where the video should begin and end by adding the start and end times.
Copying Slides - You can copy slides from one slideshow to another.
Designs - Last year I placed this as a limitation, but Google Slides has upped its game! Slides now has a stock and web media panel with images, GIFs, and stickers. Canva still offers a broader design focused workflow, but Slides is no longer limited to what you upload yourself.
Gemini in Slides – If your account has access to Gemini, it can create a new slide or enhance one you have already made. I like using “Enhance this slide” after I add pictures and links; it helps reorganize the slide while keeping the content I want (see Figure 2). Gemini features depend on your school’s Google Workspace or Google AI plan.
Sidebar – Since I first made this comparison, I’ve explored more of the design tools in Google Slides. The sidebar gives me quick access to Templates, Building Blocks, Stock & Web images, and Drive & Photos. Some accounts also show additional tools, such as AI image generation, Speaker Spotlight, or Slide Recordings, so the icons you see may differ from mine.
Potential Drawbacks
Visuals have less “wow” factor – I keep this here because Slides is not as "wow" as Canva's visuals are (just my two cents), but hats off to Slides for leveling their designs up this year.
Not a one-stop shop - It does not have that one-stop shop feel that Canva has.
Offline limits (but better than Canva) - Google’s offline setup allows you to create, open, and edit Slides files while offline, which is more than Canva's offline setup. However, same as Canva, Google Slides will not play embedded YouTube videos when offline. Additionally, offline access needs to be enabled beforehand and may be disabled by a school administrator.Using Canva for Lesson Visuals
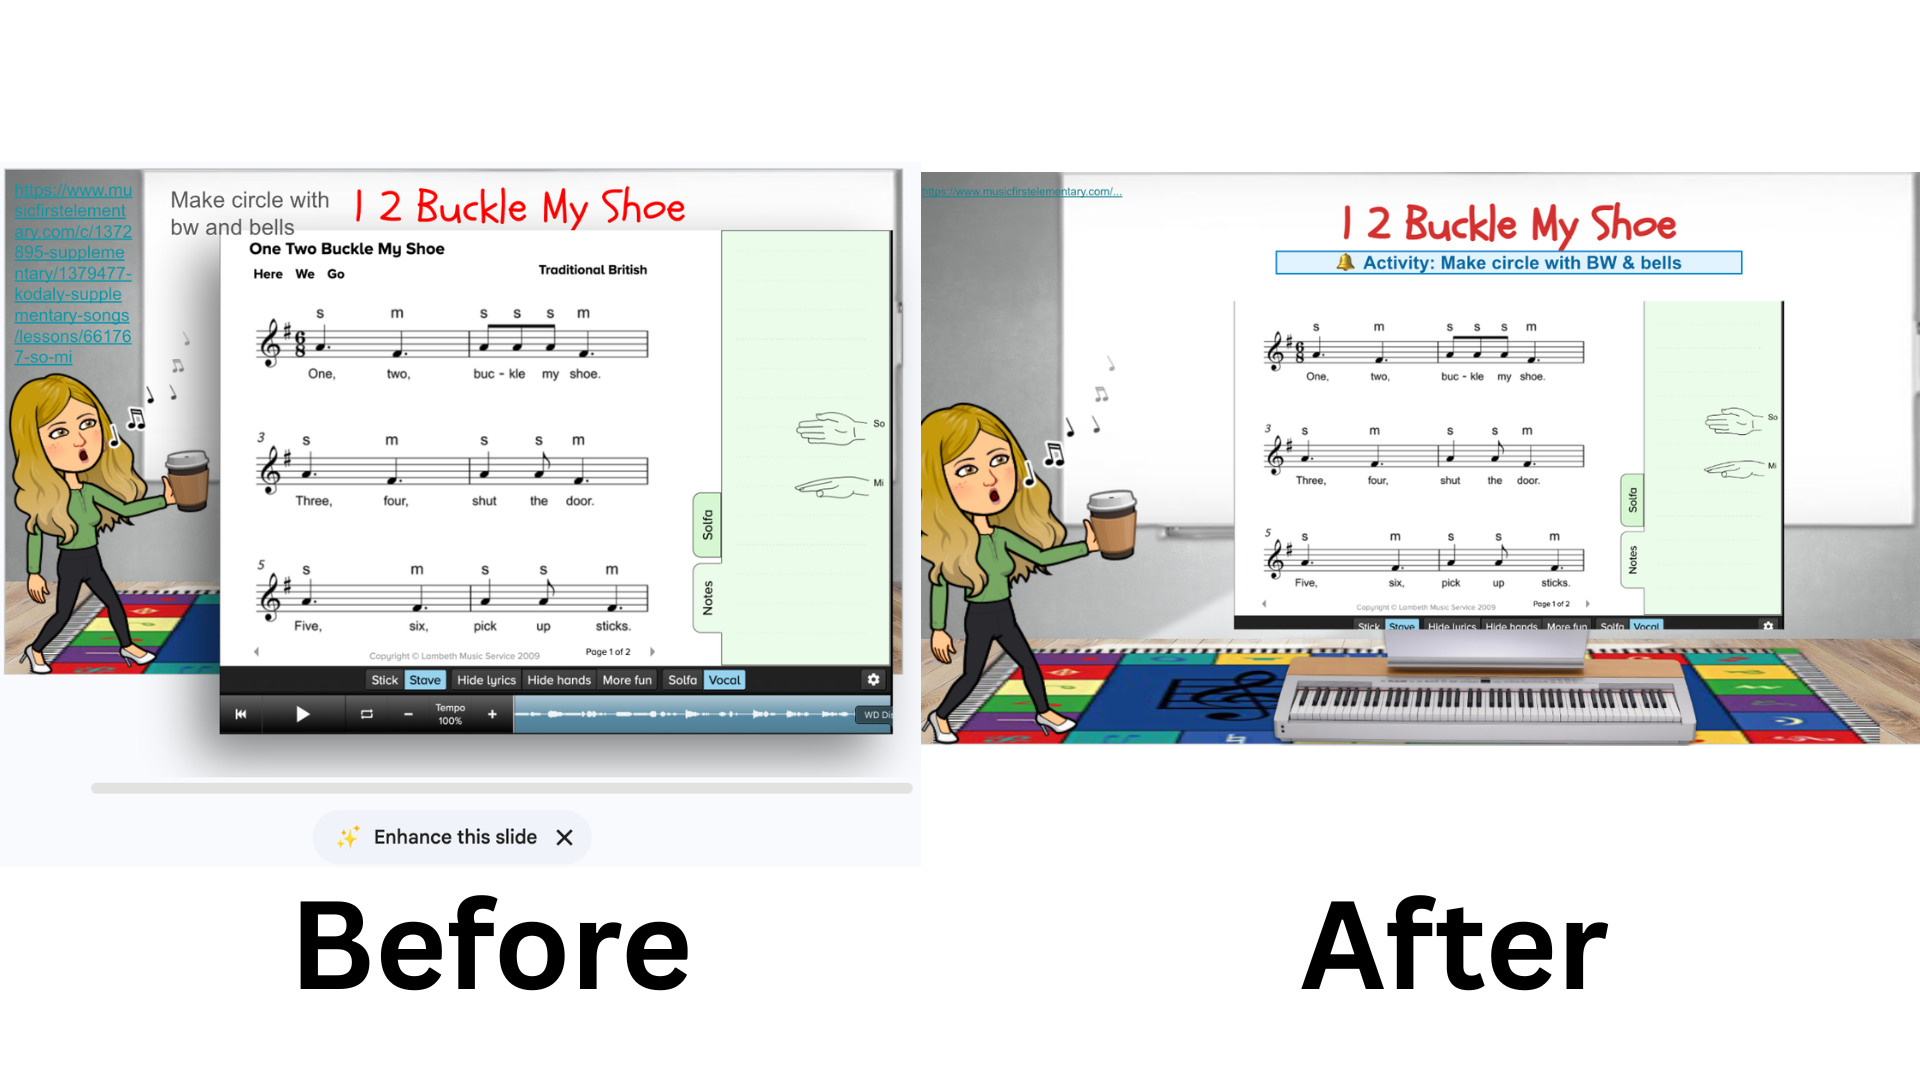
Figure 2: Google's Gemini enhancing a slide with a MusicFirst Elementary link
The Best of Both Worlds: A Hybrid Workflow
For many music educators, the sweet spot is designing in Canva and organizing in Google Slides.
Here’s how:
Create polished slides in Canva.
Export them as PNGs or PPTX files.
Import them into Google Slides to add audio, links, and other interactive features.
Practical Tips for Music Teachers
To maximize your productivity and creativity, consider the following practical tips:
Keep it simple: Don't feel overwhelmed by the numerous features and options. Keep your designs simple, focused, and easy to navigate.
Play-along video creation: If you want to create a play-along video, you can make the slides in Canva and then export them as a PowerPoint presentation. You can then open it up in PowerPoint or Keynote or Google Slides, add the music, and use a screen recording tool like Loom to screen record the play-along, advancing one slide per beat. One caveat is that it is more accurate to screen record with a presentation tool that is offline or not relying on the internet. Please message me if you would like to learn more about this process.
Caveat: Canva’s video tools have grown, so a play-along can now be built there with timed pages and audio, but it takes a lot of time and effort. It is not quite an online video editor yet, like WeVideo or Clipchamp, and with copyright audio files being strongly protected by Canva, this is not the ideal tool to use for Play-Along video creation.
Use templates: Take advantage of pre-designed templates (or even try the AI tools to have it create your specific presentation) to save time and inspiration.
Experiment and have fun: Don't be afraid to try new things and experiment with different designs, features, workflows, and tools.
Share and collaborate: Share your designs and presentations with colleagues and students, and collaborate in real-time to foster a sense of community and creativity.
Conclusion
Both Canva and Google Slides offer unique strengths and weaknesses, making them suitable for different aspects of music education. By understanding their pros and cons and leveraging hybrid workflow suggestions and practical tips, you can create engaging, effective, and visually stunning materials that enhance your teaching practice and inspire your students. Remember to keep it simple, have fun, run any tech program by your IT, and share your creations with others, if you feel comfortable doing so, to maximize your impact as an elementary music educator.
